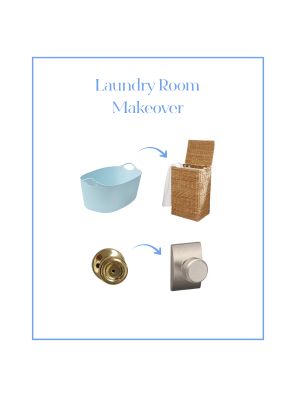
Welcome back to the One Room Challenge! If you missed the first post about my laundry room makeover, you can find it here.
Below are some of my wallpaper Inspiration images. While I loved a lot of these, I wanted the ability to just repaint without having to remove wallpaper if I want to switch things up in the future. I also liked the idea of being able to choose my own colors.

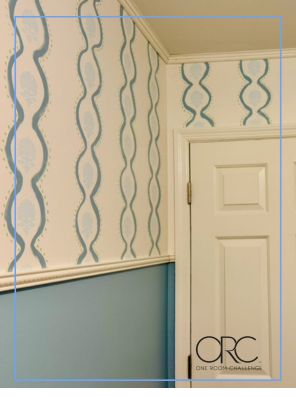
While comparing wallpaper options and looking at about 1,000 stencils, I decided to create my own stencil for the “wavy” part and I purchased a floral stencil. I figure I’ll just use a brush for the dots on the design.
My hope is that this looks great as a more watercolor free hand design than a perfectly aligned wallpaper- although I’d love that look, I don’t want to stress about making a multi-step stencil look perfect. We are down to 7 weeks for this room transformation!

After trying out a few different ideas, I settled on creating my own “wallpaper” with a Capri candle (tracing the bottom of the candle to create the wave pattern on poster board) and using Royal Design Studios Jaipur Flower Garden Furniture Stencil for the flowers. I wish I had more progress photos for you, but I was doing this late at night.
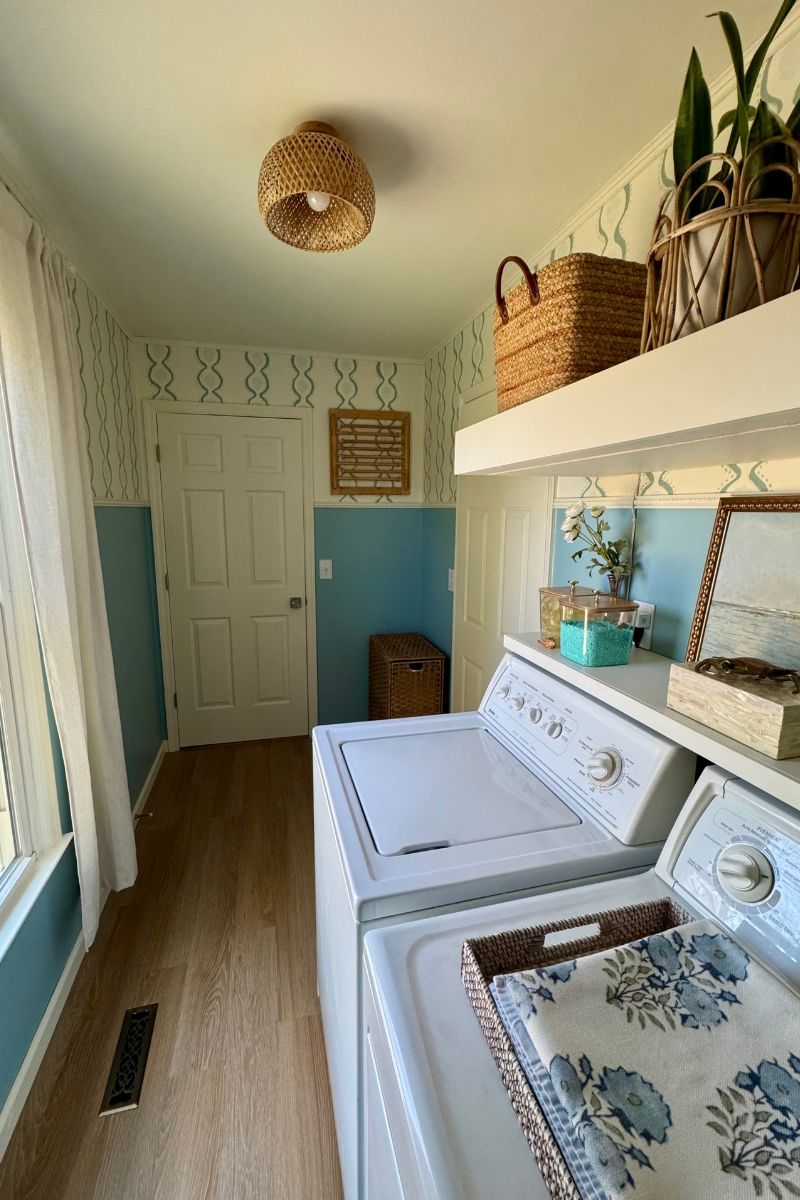
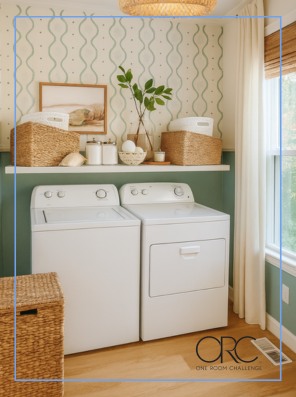
Laundry Room Paint Colors
I bought several paint samples at Sherwin Williams. I think I’ve landed on this…
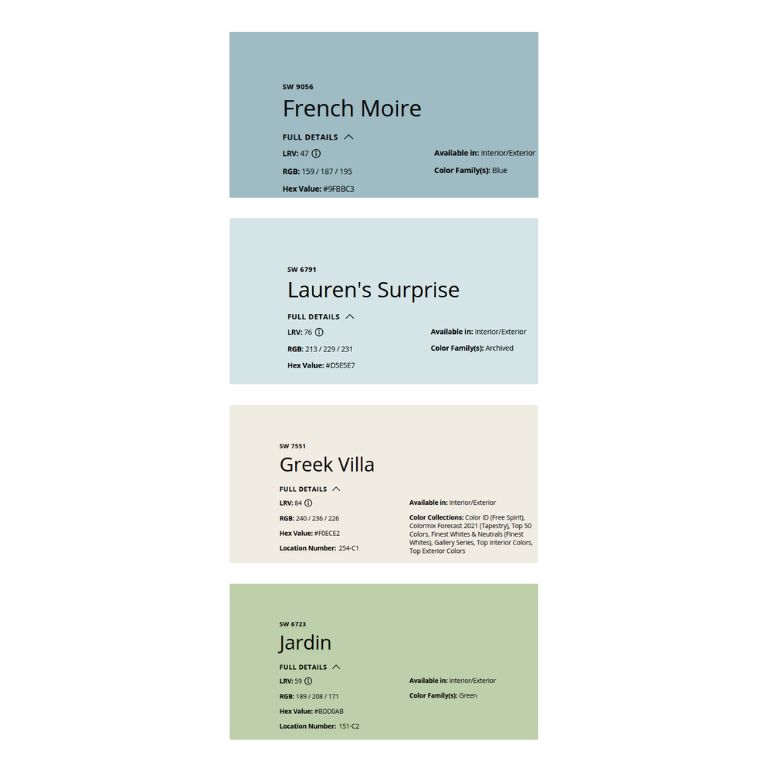
SW 9056 French Moire for the wavy part of my design (This color looks a lot more blue than gray in my laundry room).
SW 6791 Lauren’s Surprise for the flower stencil . Lauren’s Surprise is technically archived, but you can still request it. It’s such a pretty blue- it’s a contender for my sunporch ceiling project next year.
SW 6723 Jardin for the green dots of my design.
SW 7551 Greek Villa for the ceiling, doors, trim, and background for the stenciled walls. I love this color and have it in many rooms in my home. If you are looking for a warmer white, try Greek Villa.
Laundry Room Makeover Progress

The popcorn ceiling is gone! My husband and I tag teamed this project. I am thankful our laundry room isn’t huge, because your arms eventually get tired of scraping the ceiling.
Popcorn ceiling removal is pretty easy, if you want to give it a try. One caveat: please make sure your home doesn’t have lead or asbestos or other issues before attempting any home project involving the structure of your home.
You can buy something fancier, but we have had good luck using a simple tool with a plastic bag from a grocery shopping trip attached to it (the bag catches all of the popcorn) and a simple spray bottle filled with water.
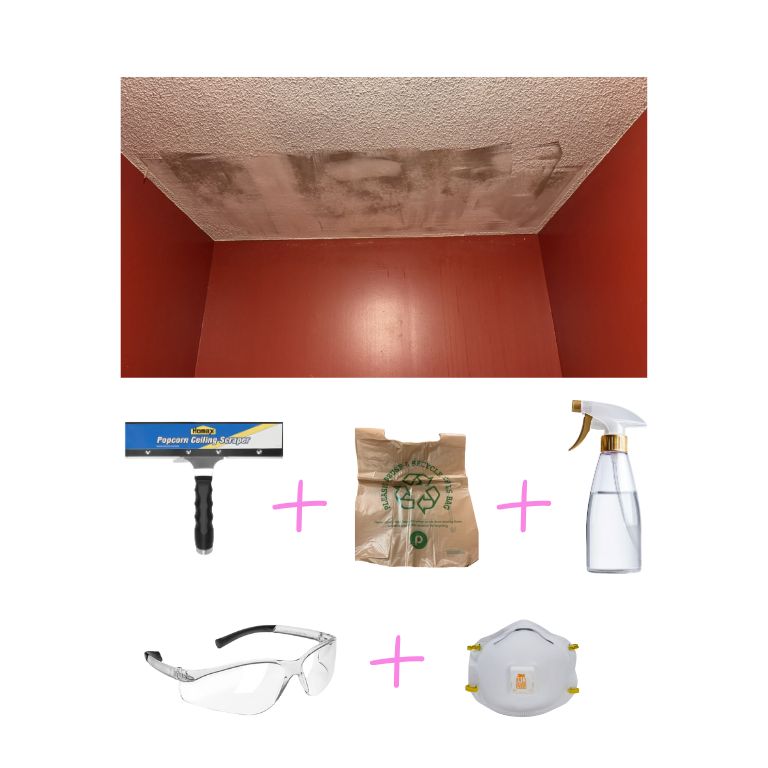
Popcorn Ceiling Removal
- Grab a mask and safety glasses
- Fill a spray bottle with water
- Grab a popcorn remover tool and a plastic bag
- Spray small sections of the ceiling with water
- Wait 5+ minutes and start scraping
- Repeat
- You may need to patch some spots if you dig into the ceiling too hard in some spots.
Next week will be alllll about painting. Am I crazy for attempting a three part stenciling project? You can check out how the other One Room Challenge rooms are progressing here.
Are you working on any home projects? I’d love to hear about them!